PHP Exercises
0. Environment Setup
Before we start, we must set up an environment where we can deploy PHP code.
This should already be set up in your classrooms' computers if you use Linux.
0.1 Install PHP and SQlite:
- In Windows:
- Open PowerShell as an administrator.
- Run 'wsl --install -d Ubuntu' to install Windows Subsystem for Linux.
- Reboot.
- Open PowerShell normally and run 'wsl'.
- Run 'sudo apt-get update' and 'sudo apt-get install php-cli sqlite3 php-sqlite3 unzip wget'.
wsl --install -d Ubuntu
# reboot
wsl
sudo apt-get update
sudo apt-get install php-cli sqlite3 php-sqlite3 unzip wget
In macOS:
- Install Homebrew.
- Run 'brew install php'.
In Linux:
- Run: 'sudo apt-get update'.
- Run: 'sudo apt-get install php-cli sqlite3 php-sqlite3 unzip wget'.
0.2 Check if everything is working:
In windows you have to open a PowerShell and run 'wsl' first.
- Run 'php --version'. Version >= 7.4 is fine.
- Run 'sqlite3 --version'. Any version should be fine.
- Download and unzip the test project into any folder.
- Open a terminal (in Windows, use PowerShell and run 'wsl') and change directory into that folder.
- Run 'sqlite3 example.db < example.sql' to create and populate the database.
- Run 'php -S localhost:9000' to start a development server (you should be able to use any port above 1024).
- In your browser, check http://localhost:9000. You should see a list of names in an HTML table.
Or just run this inside an empty folder:
php --version
sqlite3 --version
wget "https://web.fe.up.pt/~arestivo/page/exercises/php/test.zip"
unzip test.zip
sqlite3 example.db < example.sql
php -S localhost:9000
1. HTTP Parameters
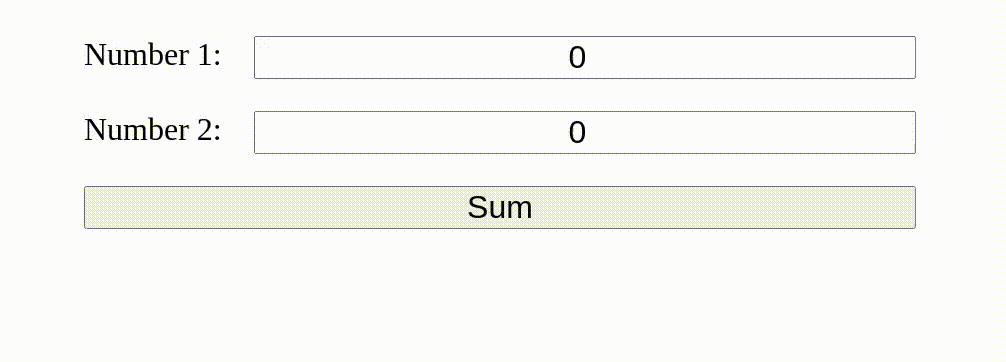
- Inside an empty folder, create a script called sum2.php that receives two numbers (num1 and num2) as arguments and prints the sum of those two numbers:
Hint: To access the arguments, you should use the special $_GET array. - On the terminal, run
php -S localhost:9000inside that same folder to start a new web server. - You can now test your page by going to http://localhost:9000/sum2.php?num1=2&num2=5.
- Make sure the output of your script is valid HTML.
- Create a new HTML file, form2.html, containing a form asking for two numbers.
Note: Make that form send the numbers to the script you created previously. - Modify the PHP file to contain a link back to the form.
2. SQLite Database creation
- If you haven't done it already, stop the webserver from the previous exercise (Ctrl-C).
- Create a new folder.
- Copy the news.sql file into that folder.
- This file contains a SQL script that creates a new database.
Open the file and see if you can understand what it does. - Create a new database inside the folder using the command:
sqlite3 -init news.sql news.db
- After this last command, the SQLite interface will become active. To verify if the database has been created correctly, try some SQL commands:
select * from news where id = 4;
select * from comments where news_id = 4;
- To exit from the SQLite interface type:
.exit
- Verify if a new file called news.db has been created using the command:
- To go back to the SQLite interface and interact with the new database type:
sqlite3 news.db
3. Listing data from SQLite
- In the same folder where you created the database, create a new PHP file called index.php.
- Run
php -S localhost:9000to start a new web server. - Open http://localhost:9000/ in your browser.
As expected, you should be seeing an empty page. - In index.php, open a connection to the database using the following PHP code:
<?php
  $db = new PDO('sqlite:news.db');
?>
- The $db variable now represents your connection to the database.
- Execute a query returning all news in the database using the following code:
  $stmt = $db->prepare('SELECT * FROM news');
  $stmt->execute();
  $articles = $stmt->fetchAll();
Important: Always use prepare and execute to prevent SQL injection attacks. More on this later.
- The variable $articles is now an associative array containing all the news in the database.
- You can iterate over this array using:
  foreach( $articles as $article) {
    echo '<h1>' . $article['title'] . '</h1>';
    echo '<p>' . $article['introduction'] . '</p>';
  }
- Verify the result at http://localhost:9000/.
4. Complete Page
- Using your recently acquired PHP superpowers, change the index.php script to create a page like the one we used in the first CSS exercise (download the solution for a faster start).
- This time, we will get the news from the database instead of them being hard-coded.
- You can use the following SQL to get all the information (article data, user information, and number of comments) about each article:
SELECT news.*, users.*, COUNT(comments.id) AS comments
FROM news JOIN
     users USING (username) LEFT JOIN
     comments ON comments.news_id = news.id
GROUP BY news.id, users.username
ORDER BY published DESC
- You can use the date function to format a date in epoch/unix time format. For example:
$date = date('F j', $article['published']);
- You can use the explode function to split a string by a separator. For example:
$tags = explode(',', $article['tags']);
- Do not forget to verify if the page returns valid HTML code.
- Also, create a new page, article.php, that receives a parameter id containing the id of an article in the database.
- This page should be able to present that article and its comments.
- Use the following code to get the article information:
  $stmt = $db->prepare('SELECT * FROM news JOIN users USING (username) WHERE id = :id');
  $stmt->bindParam(':id', $_GET['id']);
  $stmt->execute();
  $article = $stmt->fetch();
or:
  $stmt = $db->prepare('SELECT * FROM news JOIN users USING (username) WHERE id = ?');
  $stmt->execute(array($_GET['id']));
  $article = $stmt->fetch();
- And then do this to get the comments:
  $stmt = $db->prepare('SELECT * FROM comments JOIN users USING (username) WHERE news_id = ?');
  $stmt->execute(array($_GET['id']));
  $comments = $stmt->fetchAll();
- Create links from the index.php page to the article.php page in the appropriate places.
- Validate both pages.
5. Data layer separation
In this exercise, we will separate the code accessing the database from the business logic code:
- Create a new folder called database and a new file called connection.php inside that folder.
- Copy the code initializing the database connection into the new file inside a getDatabaseConnection() function.
- Replace the initialization code in all pages with a require_once instruction (including the newly created file) and a call to the new function.
- Inside the same folder, create a file called news.php. This file will be responsible for all the accesses to the news table.
- Inside this file, create a function called getAllNews that receives the database connection, queries the database, and returns an array with all the news.
- Replace any code where all articles are retrieved with calls to this new function.
- The initial PHP code in your index.php should now look like this:
<?php
  require_once('database/connection.php');
  require_once('database/news.php');

  $db = getDatabaseConnection();
  $articles = getAllNews($db);
?>
Do the same changes to your article.php page:
- Replace all database connection code with a call to getDatabaseConnection(), and all queries by calls to functions defined in the news.php file.
- Functions related to the comments table should be created in a new file called comments.php in the database folder.
In the end:
- Move the news.sql and news.db files to this new folder.
6. Presentation layer separation
- All pages in this example start and end with the same HTML code (doctype, head, header, nav, aside, ...).
- Inside a file called templates/common.php (create the new folder first), create two functions (output_header() and output_footer()) that output that code.
- Replace that code in both pages (index.php and article.php) by calling these two functions.
Notice that you can output HTML code inside a PHP function very easily. Example:
<?php function print_header($title) { ?>
  <h1><?=$title?></h1>
<?php } ?>
- For more specific HTML code, create new files in the templates folder called, for example, news.php and comments.php.
- Create functions that output a list of articles and a single article (with and without the full text and comment section).
- Replace that code on both pages by calling these new functions.
- The index.php page should now look like this:
<?php
  require_once('database/connection.php'); // database connection
  require_once('database/news.php');       // news table queries

  require_once('templates/common.php');    // common templates
  require_once('templates/news.php');      // news templates

  $db = getDatabaseConnection();           // connect to database
  $articles = getAllNews($db);             // get articles from database

  output_header();                         // output page header
  output_article_list($articles);          // output list of articles
  output_footer();                         // output page footer
?>
Notice that you can call other template functions inside a template function to simplify your code. For example:
<?php function output_article_list($articles) { ?>
  <section id="news">
    <?php foreach($articles as $article) output_article($article); ?>
  </section>
<?php } ?>
- Also, move all the CSS files into a css folder.
From this point forward, all pages should be written using this format.
7. Editing data
- Create a new page called edit_article.php that contains a form with three fields: title, introduction, and fulltext.
- Use an input with type text for the first one and textareas for the other two. Also, add a submit button.
- This page should receive a parameter called id containing the id of the article to be edited.
- Add a hidden input field containing this id.
- Retrieve the article to be edited from the database and fill the fields with its values.
- Add a link in the article.php file that points to this new page.
- The action of this new form should point to a new page called action_edit_news.php.
- This new page should receive the four values (id, title, introduction, and fulltext) and update the news table with them.
Don't forget to separate this code into the database/news.php file. - This new action page should not print any HTML. Instead, it should redirect the user back to the article.php page, sending the correct id as a parameter.
8. Authentication
- Create a new page called login.php asking for a username and a password in a form.
- This new form should send the data (username and password) to an action_login.php page.
- On this new page, start by initiating the session, verifying if the username and password are correct and, if they are, storing the username in the session. In the end, redirect back to the page you came from. Something like this:
<?php
  session_start();                                         // starts the session

  require_once('database/connection.php');                 // database connection
  require_once('database/users.php');                      // user table queries

  if (userExists($_POST['username'], $_POST['password']))  // test if user exists
    $_SESSION['username'] = $_POST['username'];            // store the username

  header('Location: ' . $_SERVER['HTTP_REFERER']);         // redirect to the page we came from
?>
- Add a session_start in all pages so you can access the current user easily in $_SESSION['username'].
- Change the header template so that if the $_SESSION array contains a valid user, it will have logout link pointing to action_logout.php (instead of the login and register links).
- Create this page to destroy the session and redirect back to the previous page.
- Change the article.php page so that the link to edit news only appears if a user is logged in.
- Change the edit_article.php and action_edit_article.php pages so that if a user is not logged in, they will redirect back to the main page.
9. Insert and Delete
- Create pages and actions to insert and delete articles.
- Create actions to insert comments.
Solutions
Solutions for these PHP exercises.